
To show custom product type fields on the WooCommerce frontend, enable Show In Front for buyer-relevant fields and select their Position In Front. The best placement answers important questions before the customer reaches the purchase decision.
Start with a visibility decision
Not every backend value belongs on the product page. For a Course type, instructor, duration, level, learning mode, materials, and access period can help the customer. Internal course codes and staff notes should remain private.
| Field | Public? | Reason |
|---|---|---|
| Duration | Yes | Sets the expected commitment |
| Course Level | Yes | Supports suitability |
| Internal Code | No | Administrative only |
| Instructor Notes | No | Private operational data |
Create a frontend field map
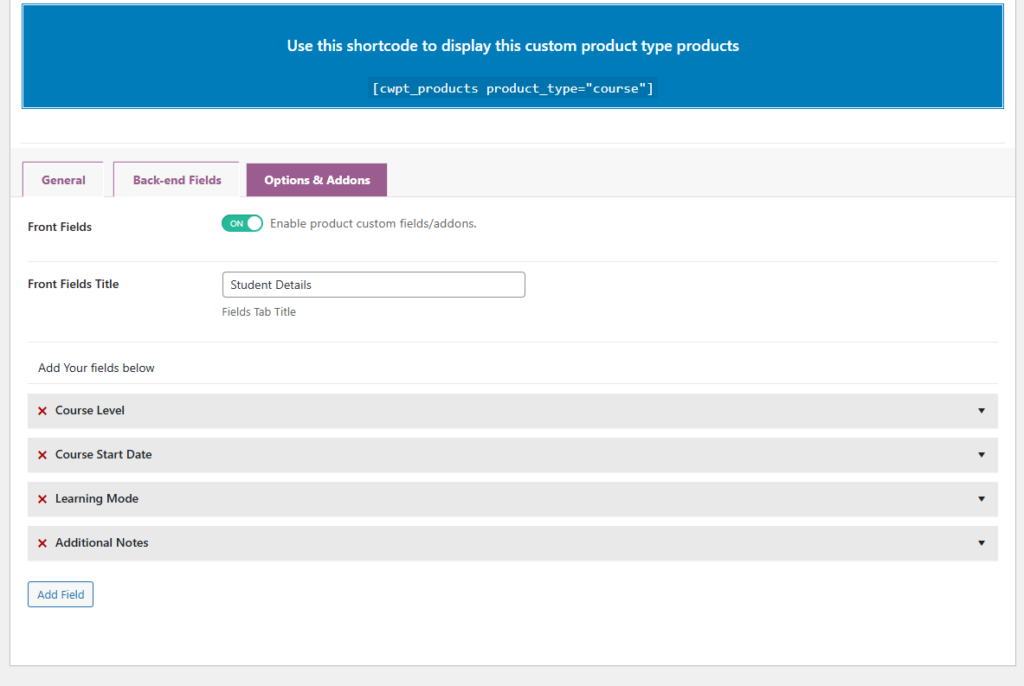
Plan the output before enabling fields. Record the customer question, label, position, and empty-state decision for each value.
| Customer question | Field | Label | Priority |
|---|---|---|---|
| Is this course suitable for me? | Course Level | Level | High |
| How much time is required? | Duration | Duration | High |
| How is it delivered? | Learning Mode | Learning Mode | High |
| Who teaches it? | Instructor | Instructor | Medium |
| What is included? | Materials | Included Materials | Medium |
This map prevents every stored value from being printed simply because it exists.
Step 1: Enable Show In Front
- Go to WooCommerce > Product Types.
- Open the Course type.
- Open Back-end Fields.
- Select a customer-relevant field.
- Enable Show In Front.
Repeat the setting only for fields that support the offer. Product data used exclusively by editors should remain available in the admin tab without public output.
Step 2: Choose Position In Front
Custom Product Type for WooCommerce provides these verified positions:
- Before Add to Cart.
- After Add to Cart.
- Before Product Meta.
- After Product Meta.
- Single Product Summary.
| Information | Useful position |
|---|---|
| Level, duration, learning mode | Before Add to Cart |
| Included materials | After Add to Cart |
| Reference information | Around Product Meta |
| Compact specification overview | Single Product Summary |
Choose placement by customer priority
Before Add to Cart is the strongest position for information that can change the decision. After Add to Cart works for useful supporting details. Product Meta positions suit reference information, while Single Product Summary can hold a compact group of core specifications.
Avoid placing the same field in several locations or repeating a structured value in the description. One source and one intentional display position produce a cleaner page.
Practical Course page arrangement
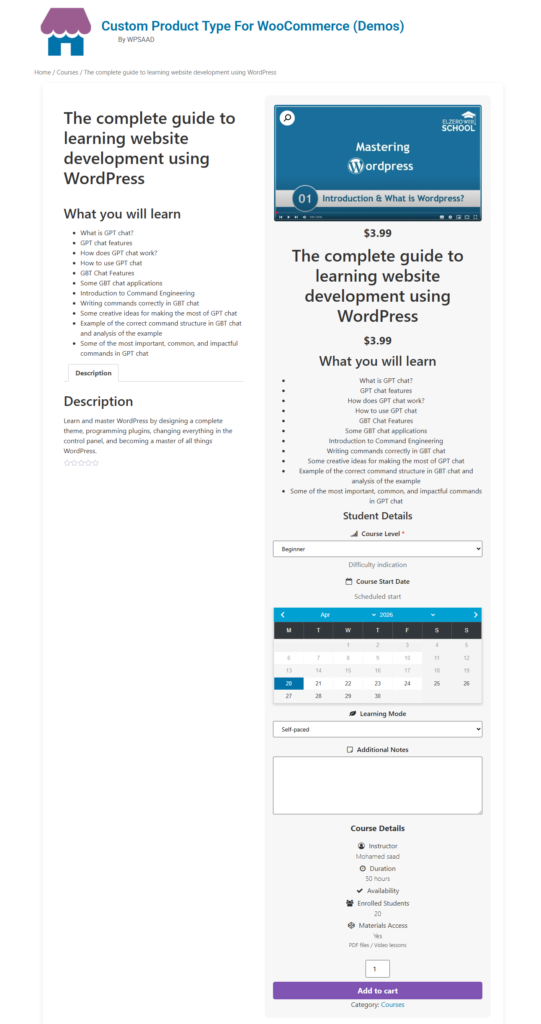
A complete course page can use the positions as a deliberate information sequence:
- The product title and benefit-led summary explain the outcome.
- Level, duration, and learning mode appear before Add to Cart.
- The purchase action follows the essential suitability information.
- Materials and access period appear after Add to Cart.
- Instructor or reference details appear around Product Meta.
This arrangement answers the highest-priority questions before the customer acts, while keeping supporting specifications available without crowding the opening section.
Adapt the method to other product types
| Product type | High-priority fields | Secondary fields |
|---|---|---|
| Service | Duration, delivery, response time | Preparation and follow-up |
| Rental | Rental period, pickup, included items | Care and reference details |
| Furniture | Dimensions, construction, lead time | Care and assembly information |
| Digital product | Compatibility, license, updates | Support and requirements |
The product type changes, but the rule remains the same: place decision-critical facts close to the purchase action and keep reference information in a secondary position.
Step 3: Test real and empty values
- Create one product with every public field completed.
- Preview the page and verify reading order.
- Create another product with optional values empty.
- Check desktop and mobile layouts.
- Move a field when it distracts from the purchase action.
Test several product states
| State | What to inspect |
|---|---|
| All fields completed | Reading order and visual density |
| Optional fields empty | No confusing gaps or incomplete information |
| Long Textarea value | Wrapping and mobile layout |
| Short numeric value | Label remains understandable |
| Different product layout | Position remains useful |
Common frontend field mistakes
- Showing internal notes or business-only data.
- Using unclear backend labels on the customer page.
- Placing secondary information before the purchase action.
- Repeating specifications in fields and descriptions.
- Testing only a fully populated product.
- Ignoring mobile output.
Use frontend data to strengthen the offer
Structured fields should support the description, not repeat it. Let the description explain the result and use the fields for scannable facts.
Build the fields with the custom field guide before configuring their public positions.
Final frontend QA checklist
- Every public field answers a customer question.
- Private fields remain hidden.
- Important information appears before the decision point.
- Labels are concise and understandable.
- Optional empty fields do not weaken the page.
- Desktop and mobile layouts are readable.
Define the field model with the custom field guide before choosing public positions. If the product type does not exist yet, follow the creation workflow first.
Frequently asked questions
Can fields appear before Add to Cart?
Yes. Select the Before Add to Cart position for facts that support the buying decision.
Should every admin field appear publicly?
No. Enable Show In Front only when the value helps customers.
Where should secondary data appear?
Before or after Product Meta is useful for reference information that should not interrupt the main purchase flow.

![Best WooCommerce Product Feed Plugins to Sell on Multiple Marketplaces [2026] | WPSAAD](https://wpsaad.com/wp-content/uploads/2026/08/Product-feed-plugin-guest-post-300x300.webp "Best WooCommerce Product Feed Plugins to Sell on Multiple Marketplaces [2026] | WPSAAD")