

A custom product tab in the WooCommerce editor gives specialized data a clear home. Instead of scattering property, course, book, or service information across descriptions and unrelated panels, editors complete one named tab designed for the product type.
This guide creates a Property Details admin tab with Custom Product Type for WooCommerce.
What belongs in the custom tab?
Group fields that share one editing task. A Property Details tab can contain area, bedrooms, bathrooms, furnishing, parking, and viewing notes. Price, SKU, and stock remain in their native WooCommerce controls.
Plan the tab as an editor workflow
A useful tab should answer one question: what does an editor need to complete for every product in this family? List the required values, optional values, field format, public visibility, and expected label before opening the settings.
| Property value | Required? | Public? | Field type |
|---|---|---|---|
| Area | Yes | Yes | Number |
| Bedrooms | Yes | Yes | Number |
| Furnishing | Yes | Yes | Select |
| Parking | No | Yes | Checkbox |
| Internal viewing note | No | No | Textarea |
This plan keeps the tab focused and prevents fields from being added simply because a control is available.
Step 1: Open the product type
Go to WooCommerce > Product Types and open the Property type. Create the type first when it does not yet exist.
The tab belongs to the product model. Add it at the type level when the same fields should guide every property, rather than building unrelated controls on individual products.
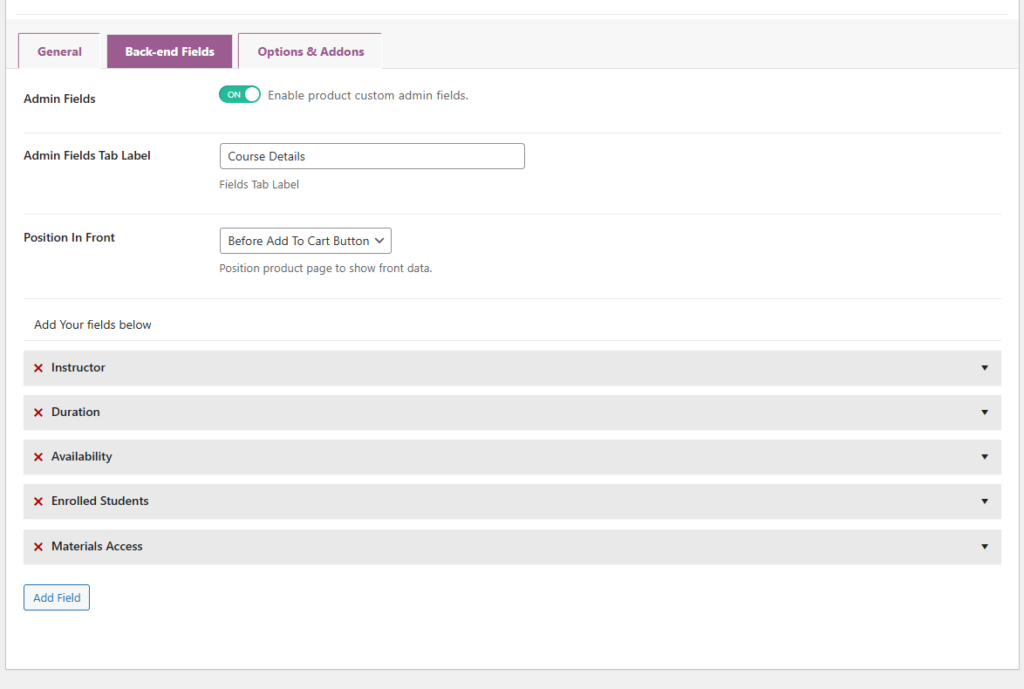
Step 2: Enable Admin Fields
- Open Back-end Fields.
- Enable Admin Fields.
- Set Admin Fields Tab Label to Property Details.
- Save the product type.
Use a task-focused label. Property Details tells editors what to complete; Extra Data does not.
Choose an effective tab label
| Weak label | Improved label |
|---|---|
| Extra Data | Property Details |
| Custom Fields | Course Details |
| More Information | Service Details |
| Other | Book Details |
The label should match the product family and the editor’s task, not the technical method used to store the data.
Step 3: Add the tab fields
| Field | Type | Example |
|---|---|---|
| Area | Number | 140 |
| Bedrooms | Number | 3 |
| Furnishing | Select | Furnished |
| Parking Included | Checkbox | Yes |
| Property Style | Radio | Modern |
| Viewing Notes | Textarea | Advance appointment required |
Match controls to the expected value
- Use Text for short names or identifiers.
- Use Textarea for longer plain-text guidance.
- Use Select for one controlled value from a list.
- Use Radio for a small visible choice set.
- Use Checkbox for a true-or-false property.
- Use Number for numeric values.
Controlled fields improve consistency across editors. Free text remains appropriate when the value cannot be constrained usefully.
Step 4: Decide which values are public
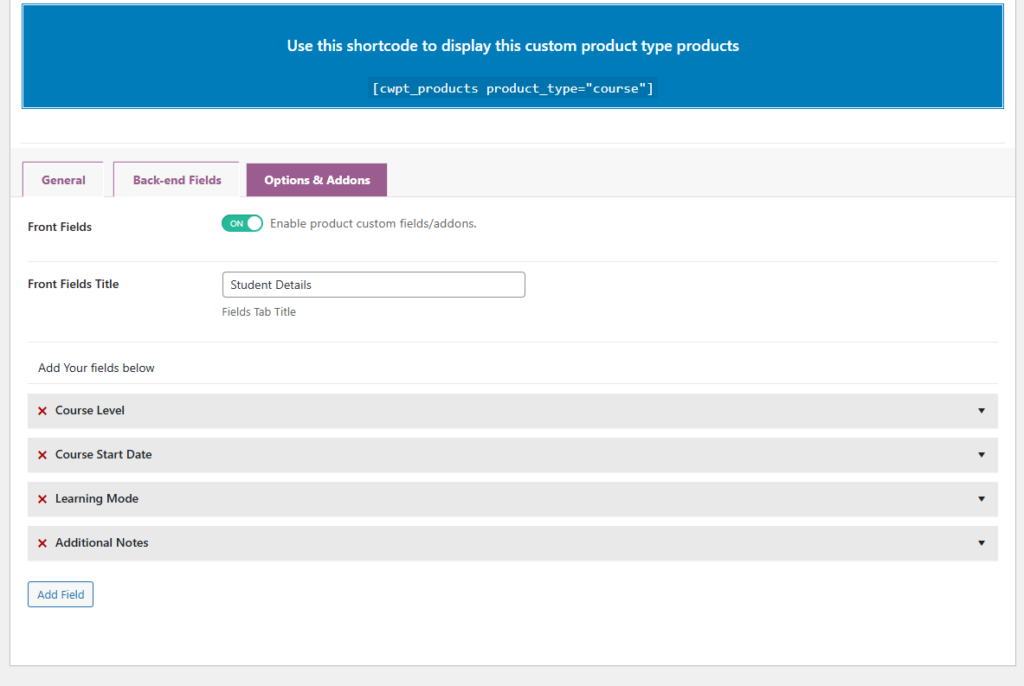
Enable Show In Front for area, bedrooms, furnishing, parking, and style. Keep internal viewing or staff notes private.
Choose a Position In Front before or after Add to Cart, around Product Meta, or inside the Single Product Summary.
Separate editor guidance from customer content
The admin tab can include information the business needs without exposing it publicly. Public fields should answer customer questions. Private fields can support review, preparation, or internal reference.
Use concise public labels and keep internal terminology inside the dashboard. A field can be valuable operationally even when Show In Front remains disabled.
Step 5: Test the editor workflow
- Create a new product and select Property.
- Open Property Details.
- Complete every field and save.
- Reopen the product to confirm the values.
- Preview public fields on desktop and mobile.
- Repeat with optional values empty.
Test with another editor
Ask a person who did not design the model to create a second property. Observe whether the tab label, field labels, controlled options, and descriptions are enough to complete the product without separate instructions.
Revise ambiguous labels before creating the wider catalog. The best admin tab reduces memory and training requirements.
Common custom tab mistakes
- Duplicating price, SKU, stock, or other native controls.
- Mixing unrelated product families in one tab.
- Using generic labels that do not guide editors.
- Showing every admin value on the storefront.
- Adding fields without testing optional empty states.
- Skipping mobile review of public output.
A successful tab makes the second property faster to create and prevents editors from inventing their own labels or page sections.
That repeatability is the practical measure of a useful admin design.
Continue with the custom field guide and the frontend display guide.
Final admin tab checklist
- The tab label names the editing task.
- Every field belongs to the product family.
- Field types match their values.
- Native WooCommerce data is not duplicated.
- Public and private values are separated.
- Another editor can use the tab successfully.
Frequently asked questions
Is this an admin tab or a frontend description tab?
It is the type-specific admin data tab used to organize product fields. Selected field values can then appear on the frontend.
Should native WooCommerce fields be duplicated?
No. Keep price, SKU, stock, and other suitable commerce data in native controls.
Can tab fields remain private?
Yes. Enable Show In Front only for customer-relevant fields.

![Best WooCommerce Product Feed Plugins to Sell on Multiple Marketplaces [2026] | WPSAAD](https://wpsaad.com/wp-content/uploads/2026/08/Product-feed-plugin-guest-post-300x300.webp "Best WooCommerce Product Feed Plugins to Sell on Multiple Marketplaces [2026] | WPSAAD")